A dual-monitor setup can make work faster, but it can also turn a normal desk into a mess of stands, cables, chargers, and wasted space. The cleanest setups usually do not start with buying more hardware. They start with screen roles, viewing distance, and getting bulky accessories off the center of the desk. Ergonomic guidance from OSHA, CDC/NIOSH, and Cornell points in the same direction: keep screens about an arm’s length away, keep the top at or slightly below eye level, reduce neck twisting, and control glare and cable paths. (osha.gov)
TL;DR
- If your desk is too shallow to keep the displays about 20 inches away, no cable organizer will make the setup feel clean. (osha.gov)
- Put the screen you use most directly in front of you. If both screens get equal use, center the seam between them and angle them slightly into a shallow curve. (ehs.weill.cornell.edu)
- Move stand bases, docks, power bricks, and the surge protector off the desktop before deciding you need a bigger desk.
- Keep cords out of walking paths and inspect them for damage. OSHA treats cords in walking areas as trip hazards and says flexible cord sets should be visually inspected. (osha.gov)
- Use the CLEAR-5 desk audit in this article before you buy anything. It can help you tell whether you need a better layout, a monitor arm, a smaller screen mix, or simply less gear.
Start with the desk, not the displays
Most clutter problems are really geometry problems. OSHA recommends keeping the monitor at least 20 inches away and notes that limited desk space can make it harder to sit upright with proper support. CDC/NIOSH gives the same arm’s-length guidance. On a shallow desk, two screens can feel crowded even before you add a keyboard, mouse, lamp, speakers, or notebook. (osha.gov)
As a practical rule, desk depth matters more than desk width until you can comfortably place the screens, keyboard, and mouse without pushing anything to the edge. If you are deciding between two large displays on a shallow desk and a smaller main screen plus a secondary display that can sit farther back, the second option often feels cleaner because it preserves the viewing distance that ergonomics guidance is trying to protect. That is an inference from OSHA’s distance and workspace guidance, not a formal size standard. (osha.gov)
Use the CLEAR-5 desk audit
Score your current setting from 0-5 before buying (1 point for each test you complete). A 4 or 5 indicates that you’ll likely need only some light accessories rather than a new desk. A score of 3 indicates that your set-up can be repaired but one serious constraint is what is causing the problem. A score of 0-2 shows that you should change your set-up before adding more components.
- C – Center: Your primary screen is directly in front of you. If you truly split time evenly, center the gap between the two screens and angle them slightly into a shallow semicircle. (ehs.weill.cornell.edu)
- L – Length: You can sit back in your chair and still keep the displays about an arm’s length away, with the top line at or slightly below eye level. (osha.gov)
- E – Elbow room: The keyboard and mouse stay close enough that your elbows remain near your body instead of reaching around monitor stands or a laptop parked in the middle. (osha.gov)
- A – Angles and anti-glare: Both screens sit at the same general height, the secondary display does not force a hard neck turn, and the screens are not facing a bright window. OSHA recommends positioning screens at right angles to windows and light sources to reduce glare. (osha.gov)
- R – Route and reduce: Cables drop off the back or one side of the desk, not across your feet or walkway, and damaged cords are replaced instead of hidden. (osha.gov)
If you fail C or L, adjust your monitor position first. If you fail E or R, get a cable and accessories to fix it. If you fail all five, try to reduce what you’ve spent before you purchase additional items.
A buying plan that matches your desk
| Your desk situation | Best layout | What to buy first | What to avoid |
|---|---|---|---|
| Under about 42 inches wide or noticeably shallow | Laptop on a stand plus one external monitor | External keyboard and mouse, laptop stand, adhesive cable clips | A forced two-monitor setup with two large stand bases |
| Around 48 inches wide and about 24 inches deep | Two moderate-size screens, or one main monitor plus a portrait secondary display | One monitor arm or riser, under-desk cable tray, mounted surge protector | Replacing the desk before you test a cleaner layout |
| 55 inches or wider with decent depth | Two larger screens or two equal screens in a shallow curve | Power and cable management first, monitor arms only if surface space is tight | Buying matching accessories before you know your final layout |
| Corner desk or L-desk | Primary screen centered in the corner, secondary screen angled on the return | Use the extra depth before buying new furniture | Setting both monitors flat on one wing and twisting toward them |
The cheapest clean setup is usually the one that removes footprints before it adds furniture. On many desks, the first dollars should go to a laptop stand or monitor riser, a cable tray, and a way to mount the surge protector under the back edge. Monitor arms are worth it when stand bases eat up the exact space your keyboard, notebook, or coffee mug keeps fighting for. OSHA also notes that corner placement can create more usable depth than a straight run of desk. (osha.gov)
A realistic small-desk example
Consider a renter working from a 48-inch-wide by 24-inch-deep desk in a one-bedroom apartment. She uses spreadsheets and documents on one screen and email, chat, and browser tabs on the other. Her first impulse is to replace the desk with a 60-inch model for $320 plus $49 delivery. Instead, she spends $32 on a laptop stand, $22 on an under-desk cable tray, $18 on clips and hook-and-loop ties, and $79 on a single monitor arm for the main display. Total: $151. The surface regains roughly a foot of usable center space because one large stand base, one power strip, and two power bricks move off the top.
The configuration is also better. The primary screen is right in front of her; the second screen is slightly offset, in portrait orientation, for message display & reference documents; and she can keep the keyboard centred. She’s bought a decent enough setup. However, she has bought back part of the workspace that was pertinent for her … the workspace directly in front of her and between her & the screens.
Set it up in this order
- Measure the desk width, depth, and where your chair naturally centers. If the desk sits tight against a wall, see whether pulling it forward a few inches improves viewing distance. OSHA specifically suggests creating room behind the monitor when depth is tight. (osha.gov)
- Choose a primary screen. Put it directly in front of you. If you use both evenly, center the seam and angle both inward slightly. (ehs.weill.cornell.edu)
- Raise or lower the screens so the top is at or just below eye level, and keep both screens at the same general height. Books, risers, and sturdy stands are fine if they are stable. (osha.gov)
- Center the keyboard first, then place the mouse immediately beside it. OSHA and Cornell both emphasize arranging the workstation around neutral posture instead of reaching to fit the hardware. (osha.gov)
- Get bulky utilities off the desk: dock, surge protector, spare charger, headphone stand, and paper stacks. Keep under-desk storage shallow enough that it does not invade legroom. OSHA warns that clutter under the work top can limit chair positioning and leg space. (osha.gov)
- Create one cable exit route, preferably down the back corner nearest the outlet. Do not let cords cross walking areas, and inspect them for worn jackets or crushed spots. (osha.gov)
- Fix lighting last. Turn the screens so they sit at right angles to windows, then adjust blinds or lamp position until glare drops. (osha.gov)
Common mistakes that make a dual-monitor desk feel crowded
- Buying two identical large monitors before measuring the desk. Bigger screens are not automatically better if they force the displays closer to your face or push the keyboard off-center. (osha.gov)
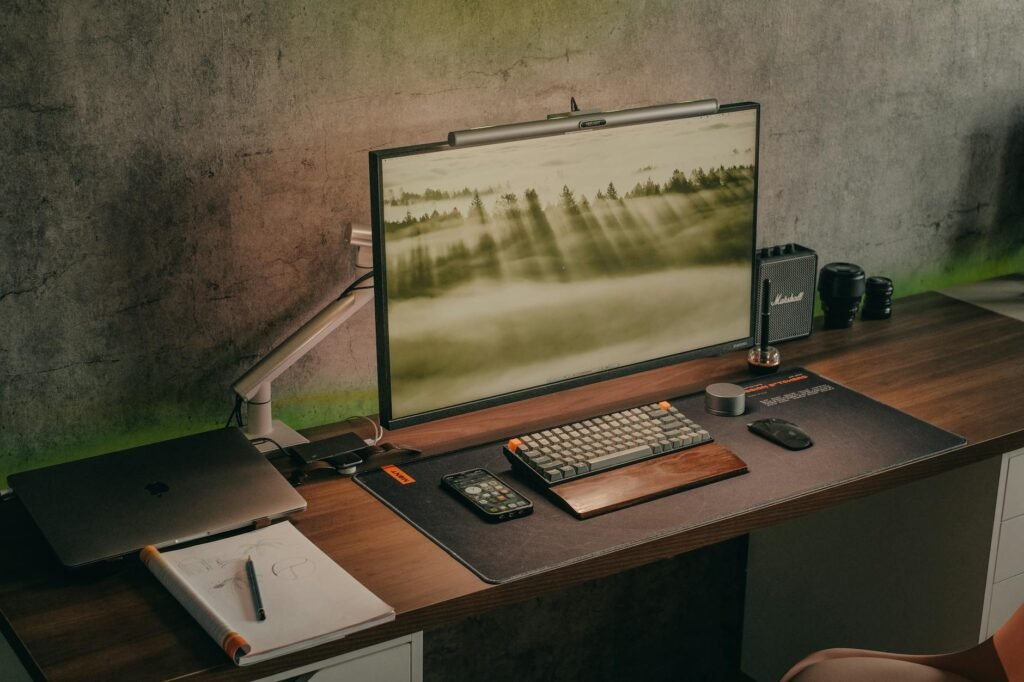
- Leaving the laptop open between the monitors. That creates a three-screen skyline and steals the most useful part of the desk unless the laptop is the true primary display.
- Treating a dual-arm mount as a magic fix. Some arms save space; others add clamp limits, wobble, or awkward cable runs on lightweight desks.
- Parking the secondary screen too far off to the side. OSHA says monitors should not be farther than 35 degrees left or right when viewed for prolonged periods. (osha.gov)
- Keeping the power strip on the desktop. It turns one cord problem into six visible ones.
- Hiding damaged cables behind furniture or allowing cords in walkways. That is both messy and unsafe. (osha.gov)
When the obvious fix still fails
Sometimes the desk is simply too small for true dual monitors, and it is better to admit that early than to keep buying prettier accessories. If you cannot pass the CLEAR-5 test without shoving the screens closer than arm’s length, reaching around the keyboard, or losing legroom, step down to a simpler setup. A laptop plus one good external monitor is often cleaner than forcing two big displays onto a shallow desk. External keyboards and mice also help when the laptop screen has to be elevated. (cdc.gov)
There are instances when having one ultra-wide display is an easier solution than having two displays as well, such as; if you have a very small work surface or a space that will need lots of quick resetting if others use the space now and then or when you have a setup that invariably will have a hard time matching monitor heights and cable paths. The disadvantages of having one ultra-wide display include cost, less efficient window management, and less opportunity to move the viewing experience around when you generally have a separate display with the chat, and/or any reference material on it. In those situations, having a dual monitor setup may create too much hardware in your workflow.
- If the desk wobbles, skip heavy arms and use low-profile stands or wall mounting where appropriate.
- If the outlet is badly placed, solve the power route before you buy display gear.
- If glare is the real problem, change monitor position or window treatment before you change screens. (osha.gov)
- If neck or shoulder pain persists after a good setup, ask HR about an ergonomic review or speak with a qualified clinician.
How to pressure-test the setup before you spend more
- Work for one full hour in your most common tasks.
- Notice which screen gets about 70 percent of your attention. If one clearly wins, make that the centered primary screen.
- Check the desk surface after that hour. If the only clear area left is a narrow strip in front of the keyboard, move utilities off the top before buying more display gear.
- Do a neck test. If you repeatedly turn your head, not just your eyes, the secondary screen is too far out. (osha.gov)
- Do a cable test. Stand up, roll the chair back, and look at the floor. Nothing should snag your feet or cross a walkway. (osha.gov)
- Do a comfort test at the end of the day. If you are leaning forward to read, increase text size or reposition the screen instead of moving it closer. OSHA and CDC/NIOSH both caution against viewing choices that force awkward posture, and NIOSH also recommends regular screen breaks. (osha.gov)
WarningThis article is informational only. If you have ongoing numbness, headaches, neck pain, or shoulder pain, or if your power setup depends on damaged cords or improvised permanent wiring, stop troubleshooting by trial and error and get help from an ergonomics specialist, clinician, employer, landlord, or qualified electrician as appropriate. (osha.gov)
Bottom line
When it comes to having a tidy dual-monitor setup, it really depends more on protecting 3 main elements: your primary focal point (to make sure it’s directly in front of you), proper distance between your body and the monitors (to be able to sit back from your screens), and one clean, direct cable route. The first step is to evaluate your desk geometry, not your gear selection. If your layout passes the CLEAR-5 test, buy some small items to help you with your setup. If your layout fails badly, focus on simplifying. Typically this is less expensive, less cluttered, and easier to deal with.
What is the cleanest dual-monitor setup for a small desk?
Usually it is one centered main monitor and one secondary display angled to the side for reference material. If both screens get equal use, center the seam between them and form a shallow curve. Keep the displays about an arm’s length away. (ccohs.ca)
Do I need a dual monitor arm?
No. If you’re losing usable space due to stand bases then an arm could potentially be of assistance. However, if your problem isn’t caused by a lack of depth in your workspace but rather the location of power points or by having too many items on your desk then any clutter issues created by using an adjustable arm may not be resolved.
Should both monitors be the same size?
It is not always required. The appearance of having two matching types of screens looks neat and tidy; however, it can be less expensive to use a mixture of different types of monitors in a multi-display device. A small secondary screen used for chatting, checking email, or reviewing documents takes up much less space than a larger horizontal display will use and may also provide value to you.
Can I use a laptop as the second screen?
Yes, but treat it like part of the ergonomics plan. If you look at the laptop often, elevate it so the screen is closer to eye level, and use an external keyboard and mouse so your hands can stay in a better position. (cdc.gov)
How do I hide monitor cables safely?
Route them down the back of the desk or one side, bundle only what belongs together, and keep cords out of walkways. Inspect cord sets for damage instead of hiding worn or crushed sections behind furniture. (osha.gov)
When is it time to buy a bigger desk?
Buy a bigger desk when you still cannot keep the screens at a comfortable distance, center the keyboard, and preserve legroom after simplifying the setup. If the CLEAR-5 score stays low after a layout reset, the furniture may be the real constraint. (osha.gov)
References
- OSHA eTools: Computer Workstations – Monitors – https://www.osha.gov/etools/computer-workstations/components/monitors
- OSHA eTools: Computer Workstations – Workstation Environment – https://www.osha.gov/etools/computer-workstations/workstation-environment
- OSHA eTools: Computer Workstations – Desks – https://www.osha.gov/etools/computer-workstations/components/desks
- OSHA eTools: Computer Workstations – Work Space – https://www.osha.gov/etools/computer-workstations/components/work-space
- CDC NIOSH: Working from Home – How to Optimize Your Work Environment and Stay Healthy – https://www.cdc.gov/niosh/blogs/2020/working-from-home.html
- Weill Cornell Medicine: Ergonomics in the Home Office – https://ehs.weill.cornell.edu/sites/default/files/wfhergonomics.pdf
- Canadian Centre for Occupational Health and Safety: Office Ergonomics – Positioning the Monitor – https://www.ccohs.ca/oshanswers/ergonomics/office/monitor_positioning.html?wbdisable=false
- OSHA SHMS Manual – Chapter 11 – https://www.osha.gov/shms/chapter-11
- OSHA Standard 1910.334 – Use of Equipment – https://www.osha.gov/laws-regs/regulations/standardnumber/1910/1910.334
- OSHA Fact Sheet: Extension Cords – https://www.osha.gov/sites/default/files/publications/OSHA4495.pdf